고정 헤더 영역
상세 컨텐츠
본문
Shape layers provide modifiers you can add to their paths to create some interesting distortion effects. You can offset them, trim them, wiggle them, distort them, and even combine these modifiers. You can use the Wiggle Paths modifier to create a waveform.Starting out in a new composition (Composition New Composition), select the Pen tool and then click in two places in the empty Composition window. Holding Shift constrains these points horizontally. This adds a shape layer to the comp consisting of a simple line. Animate the line by stretching it outward. In the Timeline panel, under Shape Layer 1, expand Contents Shape 1 Path 1.
Set a Path keyframe at the start of the comp and then move the playhead to a later time. In the Composition window, modify the path’s length by activating the Selection tool (press V) and then double-clicking an endpoint so you can drag it left or right to extend the path across the frame. This will generate a second keyframe automatically. Preview your animation and see the line grow from a short segment to a longer one. Back in the Timeline, delete (or turn off) the Fill, expand Stroke 1, and set Stroke Width as desired.

Click the Add button on the Contents layer and choose Wiggle Paths from the submenu. Expand the new Wiggle Paths 1 option and play with the parameters until you see something you like. The Points option allows you to select a jagged (Corner) or rounded (Smooth) wiggle.
With Wiggle Paths 1 expanded, set a keyframe on the current Size parameter. Go back to the beginning of the comp and set a Size keyframe at 0. Preview your animation and see the line grow outward and then increase in amplitude. If you move the starting Size keyframe later in the Timeline, you’ll delay the start of the wiggle animation.
To round out this composition, we decided to place our overlapping waveforms within a retro advertisement for a stereo turntable. After changing the shape layer modes to Multiply, we precomposed them, duplicated the precomp, and then applied a Fill effect to the bottom copy, setting the fill color to white and offsetting its position by a pixel or two to mimic the “knockout” effect used in offset printing. We placed a stereo turntable image on top of the paths, colorized it (Effect Color Correction Hue/Saturation), and added some Scale keyframes to zoom it up. We then dragged a scuff texture on top of the shape layers and dragged the background precomp to the very bottom. Finally, we added a vignette. See what we did here — and go ahead and create your own look using the sample file we’ve provided.

Soft Wiggle After Effects Youtube
Welcome to this tutorial on adding a wiggle effect to your logos using Adobe After Effects Creative Cloud 2015. The wiggle effect is a common look that editors use to enhance and add some randomness to a logo, text, or graphics. I’m going to show you two quick ways to accomplish this look.First, let’s start with a new After Effects project.
I’ve created a composition that has a piece of stock footage as my background ( Figure 1, below). As you can see in the video that accompanies this article at the 0:30 mark, this stock footage has a high-paced energy to it, and the wiggle effect will match up perfectly with this. I have a logo that's sitting on top of this background, and right now, the logo doesn't have any kind of movement applied to it.Figure 1. The After Effects comp we’ll use in this example.

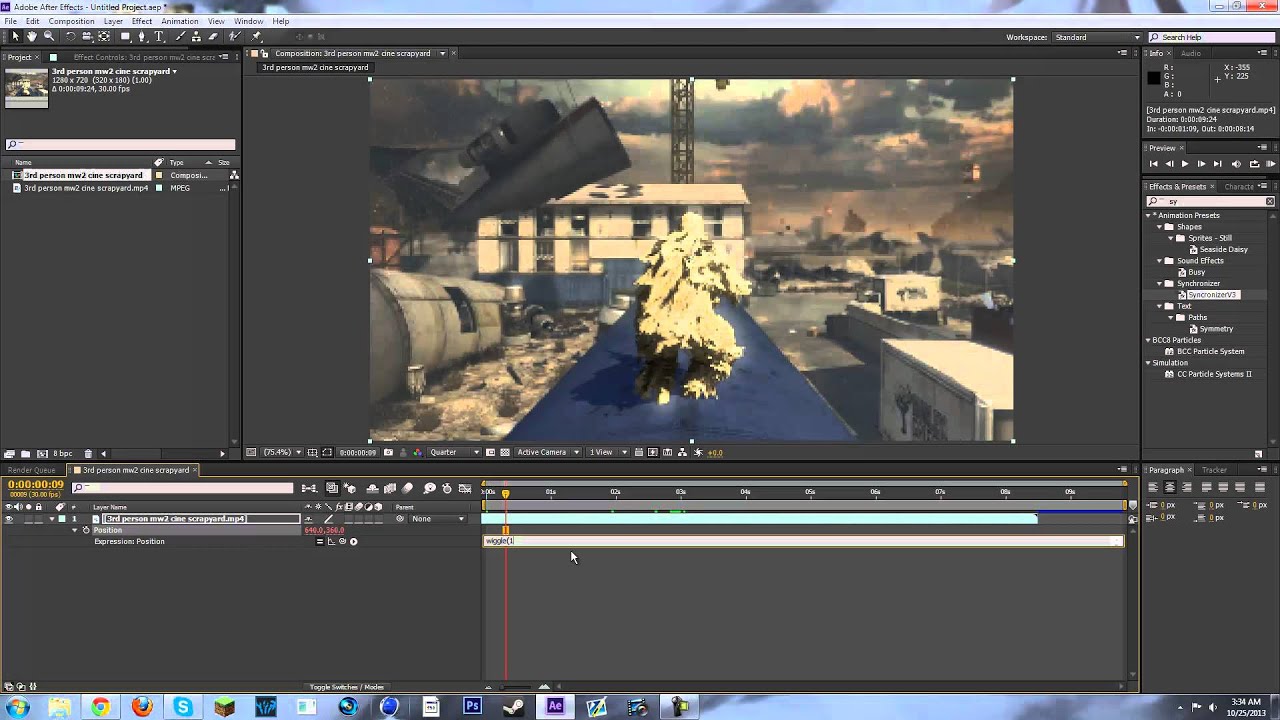
Click the image to see it at full size. Using ExpressionsThe first way I can add a wiggle effect to the logo is with the use of Expressions. In a nutshell, these are mathematical formulas that you can use to animate objects in After Effects. Now, it may sound daunting, but it's really pretty easy, and After Effects does the math for us.Open the logo's Position properties by pressing the P key on the layer. Then, press the Option key (Mac OS) or Alt key (Windows) and select the Stopwatch button.
You;ll see that the position values will turn red if you've done this correctly.Next, click in the area where it says Transform Position. Here we will enter our expression. I'll type in 'wiggle,' followed by a formula of 4,25, as shown in Figure 2 (below). By typing this, I've told After Effects to wiggle the logo 4 times a second at a motion of 25 pixels.Figure 2. Entering the Expression. Click the image to see it at full size.Once you have your values entered, click outside of the box area to apply them.
You can see a RAM preview of the effect in the tutorial video at 1:31. Now, you can adjust the formula as needed. Of course, we could have also done this manually with keyframes, but you can see how much quicker using an Expression was.
There are a ton of complicated Expressions out there that you can use. Just do a search for 'After Effects expressions' to start exploring them.s for videos, looping logos, and even events. Give it a try in your next creative project.


